2. FDISK

Using "fdisk" does not have to be a difficult chore. If you know what to expect, it is a rather easy task.Note: If you are "clean" installing Windows 2000, XP Home or XP Pro, and do not wish to multi-boot your system, you do not have to run fdisk before hand as, during the install process, options for creating partitions are built in.WARNING: Using fdisk to "resize" or recreate a partition will effectively destroy what ever information you have on your hard drive. Do not use fdisk if you wish to save any information that it may contain.

1.Image 1.1: (4KB .gif)1) Boot using a Floppy: (Image 1.1)I use a Windows Me created boot floppy to run fdisk because:It contains the "latest" fdisk utility The boot floppy has built in CD ROM support


I always start with CD ROM support, so I picked option 2.


2) Virus Warning: (Image 1.2)
If no partitions are detected, such as a new hard drive, the Windows Me boot disk is rather helpful in telling you this fact. At this point, do not be alarmed at the "virus warning" statement, as it is generic.
At the "command prompt," in this example, A:, type "fdisk" without the quotes.


3) Large Disk Support: (Image 1.3)
Unless you have a need, ensure that you enable "Large Disk Support."
Why would you "not" want this? If you have any requirements for DOS, Win3.1, Win95, or WinNT to access the partitions, you may not be able to if the partitions are greater than 2.1 GB.
I selected "Y" for yes.


4) Main Menu: (Image 1.4)
The main menu offers few, but powerful options.
If you have a new drive or one that has previous partitions already deleted, you may jump to that section, below, but it would be a good idea to look over this process, just in case you will need to perform it.
Here, I selected "3" to "Delete partition or Logical DOS Drive."
You may also select "4" to display current partition information.


5) Extended Space: (Image 1.5)
If you have more than one partition already defined, you will need to delete the ones

located in the "Extended" space.


Select "3" to do just that.


6) Choose Partition to Delete: (Image 1.6)
Here, you may choose which, if any, partitions you need to delete. If you want to resize your "Primary" partition, you will need to delete all existing partitions, redefine the Primary partition, then recreate (described below) the Extended partition section.
I chose to delete the partition (drive) marked as "E:" here. Choose what is best for your setup.


7) Are you sure? (Image 1.7)
A prompt will appear to ensure that you know what you are doing. You must type the "Volume" name of the partition, hit enter, then choose "Y" to continue with the delete.
Delete as many as you desire. After clearing out the Extended partition, you may delete the primary partition from the main menu and resize it as necessary.


8) Create Primary Partition: (Image 1.8)
Here, we need to create the Primary partition by selecting "1" from the main fdisk menu.


9) Create Primary DOS Partition: (Image 1.9)
If no partitions have been defined, select "1" to create Primary DOS Partition.
If you have already created a Primary Partition, skip the next few steps.


10) Scan Hard Drive: (Image 1.10)
The hard disk will now be scanned searching for problems.
Take note: This process may take a some time, a very long time on "large" drives.


11) All available space? (Image 1.11)
If you wish to create the Primary partition using all available space, select "Y" at the prompt. Otherwise, choose "N" to define something smaller.


12) Scan Hard Drive: (Image 1.12)
Again, the drives integrity is scanned.
No one ever accused fdisk of being a "speedy" solution


13) Enter Size in MB: (Image 1.13)
Enter in the amount of space, in MegaBytes, that you wish to use for your Primary partition.


14) Updated partition information: (Image 1.14)
After choosing an amount, the partition information is displayed. Here, I choose "1000 MB" for my Primary partition.
Hit "ESC" to continue with fdisk.


15) Make active partition: (Image 1.15)
A warning will appear under the main menu explaining the importance of an "active" partition. Really, this is no longer required, but for compatibility's sake, I choose to make a partition active, anyway.
Select "2" to set the active partition.


16) Choose active partition: (Image 1.16)
Setting the active partition is as easy as choosing the number next to "C:." In this example, it is "1."


17) Create Extended DOS Partition: (Image 1.17)
You now can create the "extended partition" portion of the hard drive. It is subject to debate whether this step is required, but, once again, for compatibility purposes, I choose to do so.
Select "2" to Create the Extended DOS Partition.


18) Choose space allocated: (Image 1.18)
Choose how much space the Extended partition is allowed to use.
Under usual circumstances, choose all. Your requirements may vary, but I have yet to find a reason "not" to choose all of the remaining space.


19) Updated partition information: (Image 1.19)
The partition information will be displayed, including your previous "Primary" and now your "Extended" partition information.
Hit "ESC" to continue.


20) Scan Hard Drive: (Image 1.20)
Once again, the drive will be verified.


21) Enter Size in MB: (Image 1.21)
Choose the amount of each additional partition, up to the maximum size.
Here, I chose 2000 MB.


22) Updated partition information: (Image 1.22)
The Partition information is displayed, as well as drive integrity confirmed.
At this point, you may continue defining partitions, or exit out and define them using the setup program of a "newer" OS, like Linux, Win2k, or XP. Again, Win9x/Me does not have the option of partition creation during setup


23) Additional Partitions: (Image 1.23)
Here, I defined 3 additional partitions, not including the Primary one, taking up all of the available space.
Hit "ESC" to continue.


24) Reboot System: (Image 1.24)
You are prompted with a "restart" message.
This is a vital step. Ensure that you do restart the computer before continuing with the installation of any OS. I even power down the computer, but that is not necessary.
5.2.2 NOS Certifications and Jobs

Network Operating System(s) covered:

  1. 1.Ideal entry into application development or software project management using Java technology.
  2. Demonstrate fundamental proficiency in the Java programming language
  3. Demonstrate advanced proficiency in the Java programming language
Certification(s) Title:

  • Sun Certified Java Associate
  • Sun Certified Java Programmer
  • Sun Certified Java Developer
  • Courses/Training required for Certification:
  • Practical Java knowledge.
  • JAVA Programming and Certification courses overview
  • Introduction to Java Programming
  • Object-Oriented Programming in Java
  • Java Generics and non-generic collections
  • Enhanced for Loop in Java programming
  • Autoboxing and AutoUnboxing in Java Programming
  • Java Class Design
  • Advanced Class Features in Java Programming
  • Typesafe Enums
  • Varargs
  • Java Static Import
  • Metadata (Annotations)
  • Formatted Input/Output
  • Concurrency Features

    2.2.2 Diagnostic Software
    1. Hardrive Manufacturers
    Seagate
    Western Digital
    2. Diagnostic Software
    Manufacturer: Western Digital
    Software Name: Data Lifeguard
    File Name: WinDLG.zip
    File Size: 4.25 MB
    Version: Version 1.09b
    Publish Date: March, 2007
    Description: This is a Windows version of the Data Lifeguard Diagnostics utility. The utility can perform drive identification, diagnostics, and repairs on a Western Digital FireWire, EIDE, or USB drive. In addition, it can provide you with the drive's serial and model numbers.

"Screen shots of the ff. OS"

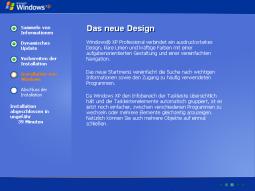
1.1 Windows XP


Windows XP The Windows eXPerience operating system is available as home and professional edition and are similar suitable for the use on standalone computers. The home edition is suitable for user which worked with Windows 9x/ME till now and don't need special network or security features in theire environment. If the user have used Windows NT/2000 private, in business or both, the Professional Edition is not only with a view of the administration optimally. Microsoft already encloses 10,000 drivers on the installation media of Windows XP, about the Windows update further more 2,000 drivers are available.
The Professional Edition of Windows XP has more network features than the Home Edition. An update of Windows 9 x/ME is possible, with Windows NT/2000 only the Professional Edition can be used for update. Optional FAT32 and NTFS are available as a file system for the installation partition.
Windows XP (Windows version 5.1) becomes a predecessor of Windows 9x/ME as well as Windows NT/2000 and is available for 32-bits CPUs in the following versions:
- Embedded - Home Edition (1 CPU) for private user (Oct. 2001) - Professional Edition (2 CPU) for business user (Oct. 2001) - Media Center (1 CPU) especially for multimedia devices (Nov. 2002) - Tablet PC Edition especially for Tablet PCs (Nov. 2002) - Server Edition (4 CPU) - Advanced Server (8 CPU), also 64-bit Intel CPUs - Microsoft Windows Fundamentals for Legacy PCs (July 2007)
A 64-bit version of Windows XP was announced officially of Microsoft in April 2003. The RC2 was available in February 2005. Windows XP Professional x64 was published in April 2005. At most 16 gbyte RAM are utilizably with that, the virtual address range enlarges to 16 tbyte.
Same will be the product activation at all versions, which is needed at every new installation or extensive upgrade of the PC devices. Company customers can use an so-called Corporated version by a special licensing option without this product activation.
As the most visual innovation the revised Windows interface with the new design is well done, the design called Luna (as of beta 2428) can display window elements in high colour. The return to the interface as of Windows 2000 is further possible. The representation and organisation of the central registry is quit the same as used in Windows 2000.


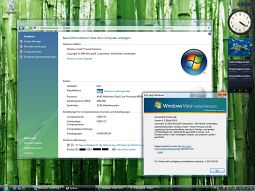
1.2 Windows VISTA


Microsoft published the new product name Vista for this new Windows Version on an event in the USA/Atlanta on 21-07-2005. This Windows Version was known under the development name Longhorn before. The installation of Vista is based on WIM (Windows Imaging format), a file-based Image Format. It compresses the contained files and can be used for the installation on several platforms from the same Image. The image on the DVD contains a pre-installation of the system directories of Windows in the Windows Imaging (.WIM) file and adapts to the hardware configuration. With the User State Migration Toolkit the user defined settings can be imported of Windows 2000 and Windows XP. An advantage of WIM images is the easy integration of new drivers and updates, the LZX compression provides the smallest file size and XPress compression the fastest compression. The installation DVD of Windows Vista already contains about 16,000 drivers, the Windows update offers further 14,000 drivers for supported hardware. There is no licence key during the Windows Vista installation necessary, in this case it start with a 30 days trial license. After this time period the activation of the operating system is inevitably with the Internet Explorer, after the start-up Windows opens only this window for activation. Windows Vista contains DRM technology for the playback of protected multimedia files.


1.3 Windows 2000

Microsoft released this new Windows version 5.0, Build 2195 in February 2000. It is the desktop operating system of the new Windows 2000 platform for x86 architecture and be completed by the versions Windows 2000 Server, Windows 2000 Advanced Server and Windows 2000 Datacenter Server. As a minimum requierement for the installation a Pentium processor, 32 mbyte main memory and 650 mbyte of free hard disk storage are needed. Microsoft had planned to develop also a operating system version for the Alpha architecture, the plans were stopped after an announcement of Compaq. Compaq restricted the support to Windows NT 4.0 with service pack 6 and not higher at 1999-08-25. Microsoft stopped the development plans for the Windows 2000 32- bit of Alpha version after that. Windows 2000 unites defined roughly the user-friendliness, pug & play and USB device support of Windows 98 and the safety and stability of the Windows NT family. The update to this new operating system is possible from Windows 95, 98 and Windows NT 3.51, 4.0. It is a multitasking, multiprocessing operating system and supports up to 2 processors of the x86 32- bit and 64 bit architecture with SMP. Threads or processes can choose between the available processors. Beside the complete revision new features and many improvements are integrated. The result is high compatibility, simplified administration, increased hardware support with over 7,000 devices, file administration and extended security functions. Applications for Windows 9x are only supported restrictedly. The installation is possible from CD-ROM or over the network from a file server. The virtual addressable storage is 4 gbyte and is managed by the Virtual Memory manager (VMM). VMM assigns the addressable storage on the actually available physical memory and the memory page file (pagefile.sys) on hard disk.


1.4 Windows Linux
Red Hat Linux 9.0.93 beta, codenamed "Severn", was released today. Read more for a quick commentary and six screenshots of the release.Installation hasn't changed much, it is now more refined, and the last bit about configuring graphical/text mode booting and X configuration is now completely gone. Red Hat Linux beta has successfully probed my E-540 Sony 21" monitor and my Matrox card, but for safety reasons, defaulted it in 1024x768 res instead of 1600x1200@85Hz (monitor's recommended). All hardware is working correctly, it even found my USB Creative WebCam Pro for use with GnomeMeeting.
After you install the 3 CDs and you do the first booting, right after the kernel is loaded, you are greeted with a graphical booting procedure. It is plain, but it works... I have to note here that while Red Hat successfully told LILO to load an SMP kernel for my dual Celeron system, it would stop loading the OS right after initializing the swap. Reseting the machine and booting with the non-SMP kernel, worked fine.
There is a first-time wizard, where you can create new users, subscribe to Red Hat Network etc. After that, Gnome is loaded and it looks pretty much, exactly the same as in Red Hat Linux 9. There are of course some new packages, like Evolution 1.4.3, Mozilla 1.4, but a lot of other packages are still not updated, e.g. OOo, the core Gnome itself (2.2.0 the About box says), but they should be before the release.
There are updates on many preference panels, and a few news ones too. There is new panel for graphics display (and even a per-user resolution panel --no need to be root to change your res), an updated package manager panel, updated hardware list panel etc.
There are still a few bugs around, which is normal, as this is a beta. Most noteworthy are Mozilla's fonts which are now bolding on many web pages where it shouldn't (including osnews' and parts of slashdot's), the Theme Manager has a problem when displaying the little theme thumbnails when changing themes, notification area is completely buggered up on my fresh installation. I am sure these small problems will be fixed before the final version though.
I hope some packages will be added till then, like the Vera fonts (which exists on Rawhide, but not on Severn). Another addition I would like to see is BlueFish 1.0, Gnumeric 2.x and AbiWord 2.0. At least two of these packages should be releasing their final versions before the release of Severn itself in October.
Please note that the screenshots below are showing the Gnome desktop using the high quality Vera TTF fonts, which I installed afterwards. The default Red Hat installation is still using the Sans fonts as in its previous versions.

SOFTWARE


1. LATEST OPERATING SYSTEM FROM MICROSOFT

Windows 7 (formerly codenamed Blackcomb and Vienna) is the next release of Microsoft Windows, an operating system produced by Microsoft for use on personal computers, including home and business desktops, laptops, Tablet PCs, and media center PCs.[1]

Microsoft stated in 2007 that it is planning Windows 7 development for a three-year time frame starting after the release of its predecessor, Windows Vista, but that the final release date will be determined by product quality.[2]

Unlike its predecessor, Windows 7 is intended to be an incremental upgrade with the goal of being fully compatible with existing device drivers, applications, and hardware.[3] Presentations given by the company in 2008 have focused on multi-touch support, a redesigned Windows Shell with a new taskbar, a home networking system called HomeGroup,[4] and performance improvements. Some applications that have been included with prior releases of Microsoft Windows, most notably Windows Mail, Windows Calendar,[citation needed] Windows Movie Maker, and Windows Photo Gallery, are no longer included with the operating system; they are instead offered separately (free of charge) as part of the Windows Live Essentials suite.[5]

DEVELOPMENT

Originally, a version of Windows codenamed Blackcomb was planned as the successor to Windows XP and Windows Server 2003. Major features were planned for Blackcomb, including an emphasis on searching and querying data and an advanced storage system named WinFS to enable such scenarios. Later, Blackcomb was delayed and an interim, minor release, codenamed "Longhorn" was announced for 2003.[6] By the middle of 2003, however, Longhorn had acquired some of the features originally intended for Blackcomb. After three major viruses exploited flaws in Windows operating systems within a short time period in 2003, Microsoft changed its development priorities, putting some of Longhorn's major development work on hold in order to develop new service packs for Windows XP and Windows Server 2003. Development of Longhorn was also "reset" in September 2004.

Blackcomb was renamed Vienna in early 2006,[7] and again to Windows 7 in 2007.[2] In 2008, it was announced that Windows 7 would also be the official name of the operating system.[8][9]

Bill Gates, in an interview with Newsweek, suggested that the next version of Windows would "be more user-centric."[10] Gates later said that Windows 7 will also focus on performance improvements;[11] Steven Sinofsky later expanded on this point, explaining in the Engineering Windows 7 blog that the company was using a variety of new tracing tools to measure the performance of many areas of the operating system on an ongoing basis, to help locate inefficient code paths and to help prevent performance regressions.[12]


LATEST OPERATING SYSTEM FROM SUN MICROSYSTEMS

SOLARIS 10 and SunOS 5.10

includes "x64" or x86-64 (AMD64/Intel 64) support, DTrace (Dynamic Tracing), Solaris Containers, Service Management Facility (SMF) which replaces init.d scripts, NFSv4. Least privilege security model. Support for sun4m and UltraSPARC I processors removed. Support for EISA-based PCs removed. Adds Java Desktop System (based on GNOME) as default desktop. [26]

  • Solaris 10 1/06 added the GRUB bootloader for x86 systems, iSCSI Initiator support and fcinfo command-line tool.
  • Solaris 10 6/06 added the ZFS filesystem.
  • Solaris 10 11/06 added Solaris Trusted Extensions and Logical Domains.
  • Solaris 10 8/07 added Samba Active Directory support,[27] IP Instances (part of the OpenSolaris Network Virtualization and Resource Control project), iSCSI Target support and Solaris Containers for Linux Applications (based on branded zones), enhanced version of the Resource Capping Daemon (rcapd).
  • Solaris 10 5/08 added CPU capping for Solaris Containers, performance improvements, SpeedStep support for Intel processors and PowerNow! support for AMD processors [28] [29]
  • Solaris 10 10/08 added boot from ZFS and can use ZFS as its root file system. Solaris 10 10/08 also includes virtualization enhancements including the ability for a Solaris Container to automatically update its environment when moved from one system to another, Logical Domains support for dynamically reconfigurable disk and network I/O, and paravirtualization support when Solaris 10 is used as a guest OS in Xen-based environments such as Sun xVM Server.


LATEST OPERATING SYSTEM FROM LINUX


Mandriva is proud to present its latest distribution: Mandriva Linux 2009. This new version has been designed to meet the expectations of our users and offers an ever more efficient solution to their needs.

Mandriva Linux 2009 goes further in its innovations and offers a thoroughly modern and cutting-edge graphical environment: KDE 4.1. Personalizable, modular, scalable, and full of visual effects that enhance the environment, KDE's new version is usable everywhere, from the oldest hardware to the newest.

Mandriva’s team has gone to great lengths to integrate this new environment in a way that ensures everyone can jump right in to using it, with a customized graphical theme, careful choice of the most powerful applications, and a default configuration tuned to your system's particular hardware.

Beyond the features that contributed to the success of Mandriva Linux 2008 and Mandriva Linux 2008 Spring, Mandriva Linux 2009 integrates the latest innovations, from office applications to the latest virtualization technologies. Mandriva Linux 2009 gives you not only the most advanced and
easy-to-use Linux operating system on the market but also the latest software demanded by the community.

Changes include:

An updated set of commercial applications in the Powerpack edition: Fluendo audio and video codecs, advanced touching-up of digital images with LightZone, virtualisation with VmWare, and Google applications;

Complete overhaul of the graphic installer;

Simplification and improved reliability of application installations and updates: notification of new distribution versions via Mandriva Online, and automatic configuration of official repositories;

Latest versions of leading open source applications: integration of KDE 4.1, GNOME 2.24, OpenOffice.org 3, Firefox 3;

Faster boot time;

Improved parental control utility, now with time-based restrictions;

Installer now capable of detecting low-resource systems or netbooks, and installing an appropriate environment (GNOME is default for netbooks);

Detection and optional automatic removal of packages known as orphans (packages previously installed which are no longer required) to optimize free space and future updates;

Constantly improving hardware support (kernel 2.6.27) with particular attention paid to netbooks.

Easy, 100% graphical synchronization with mobile devices: Windows Mobile 2002 and 2003 as well as Windows Mobile 5 and 6, all Blackberry devices, and many Nokia devices.

Mandriva Linux 2009 is available in three editions: Powerpack (the commercial edition, including exclusive commercial software, support, and services), One (a live CD which can also be installed to the system permanently) and Free (an edition which contains only free / open source software).


II. WINDOWS XP INSTALLATION PROCEDURES

Step 1 - Start your PC and place your Windows XP CD in your CD/DVD-ROM drive. Your PC should automatically detect the CD and you will get a message saying "Press any key to boot from CD".

Step 2 - At this stage it will ask you to press F6 if you want to install a third party Raid or SCSI driver. If you are using a an IDE Hard Drive then you do not need to press F6. If you are using a SCSI or SATA Hard drive then you must press F6 otherwise Windows will not detect your Hard Drive during the installation. Please make sure you have the Raid drivers on a floppy disk. Normally the drivers are supplied on a CD which you can copy to a floppy disk ready to be installed. If you are not sure how to do this then please read your motherboard manuals for more information.

Step 3 - Press S to Specify that you want to install additional device.

Step 4 - You will be asked to insert the floppy disk with the Raid or SCSI drivers. Press enter after you have inserted the disk.

Step 5 - You will see a list of Raid drivers for your HDD. Select the correct driver for your device and press enter.

Step 6 - You will then get a Windows XP Professional Setup screen. You have the option to do a new Windows install, Repair previous install or quit. Since we are doing a new install we just press Enter to continue.

Step 7 - You will be presented with the End User Licensing Agreement. Press F8 to accept and continue

Step 8 - This step is very important. Here we will create the partition where Windows will be installed. If you have a brand new unformatted drive you will get a screen similar to below. In our case the drive size is 8190MB. We can choose to install Windows in this drive without creating a partition, hence use the entire size of the drive. If you wish to do this you can just press enter and Windows will automatically partition and format the drive as one large drive.

However for this demonstration I will create two partition. The first partition will be 6000MB (C: drive) and second partition would be 2180MB (E: drive). By creating two partition we can have one which stores Windows and Applications and the other which stores our data. So in the future if anything goes wrong with our Windows install such as virus or spyware we can re-install Windows on C: drive and our data on E: drive will not be touched. Please note you can choose whatever size partition your like. For example if you have 500GB hard drive you can have two partition of 250GB each.
Press C to create a partition.

Step 9 - Windows will show the total size of the hard drive and ask you how much you want to allocate for the partition you are about to create. I will choose 6000MB. You will then get the screen below. Notice it shows C: Partition 1 followed by the size 6000 MB. This indicates the partition has been created. We still have an unpartitioned space of 2189MB. Next heighlight the unpartitioned space by pressing down the arrow key. Then press C to create another partition. You will see the total space available for the new partition. Just choose all the space left over, in our case 2180MB.

Step 10 - Now you will see both partition listed. Partition 1 (C: Drive) 6000MB and Partition 2 (E: Drive) 2180MB. You will also have 8MB of unpartitioned space. Don't worry about that. Just leave it how its is. Windows normally has some unpartitioned space. You might wonder what happened to D: drive. Windows has automatically allocated D: drive to CD/DVD-ROM.
Select Partition 1 (C: Drive) and press Enter.

Step 11 - Choose format the partition using NTFS file system.This is the recommended file system. If the hard drive has been formatted before then you can choose quick NTFS format. We chose NTFS because it offers many security features, supports larger drive size, and bigger size files.

Step 12 - After the setup has completed copying the files the computer will restart. Leave the XP CD in the drive but this time DO NOT press any key when the message "Press any key to boot from CD" is displayed. In few seconds setup will continue. Windows XP Setup wizard will guide you through the setup process of gathering information about your computer.

Step 13 - Choose your region and language.

Step 14 - Type in your name and organization.

Step 15. Enter your product key.

Step 16 - Name the computer, and enter an Administrator password. Don't forget to write down your Administrator password.

Step 17 - Enter the correct date, time and choose your time zone.

Step 18 - For the network setting choose typical and press next.

Step 19 - Choose workgroup or domain name. If you are not a member of a domain then leave the default settings and press next. Windows will restart again and adjust the display.

Step 20 - Finally Windows will start and present you with a Welcome screen. Click next to continue.

Step 21 - Choose 'help protect my PC by turning on automatic updates now' and press next.

Step 22 - Will this computer connect to the internet directly, or through a network? If you are connected to a router or LAN then choose: 'Yes, this computer will connect through a local area network or home network'. If you have dial up modem choose: 'No, this computer will connect directly to the internet'. Then click Next.

Step 23 - Ready to activate Windows? Choose yes if you wish to active Windows over the internet now. Choose no if you want to activate Windows at a later stage.

Step 24 - Add users that will sign on to this computer and click next.

Step 25 - You will get a Thank you screen to confirm setup is complete. Click finish.

Step 26. Log in, to your PC for the first time.

Step 27 - You now need to check the device manager to confirm that all the drivers has been loaded or if there are any conflicts. From the start menu select Start -> Settings -> Control Panel. Click on the System icon and then from the System Properties window select the Hardware tab, then click on Device Manager.

If there are any yellow exclamation mark "!" next to any of the listed device, it means that no drivers or incorrect drivers has been loaded for that device. In our case we have a Video Controller (VGA card) which has no drivers installed.

Your hardware should come with manufacturer supplied drivers. You need to install these drivers using the automatic setup program provided by the manufacturer or you need to manually install these drivers. If you do not have the drivers, check the manufacturers website to download them.

To install a driver manually use the following procedure:

(a) From the device manager double click on the device containing the exclamation mark.

(b) This would open a device properties window.

(c) Click on the Driver tab.

(d) Click Update Driver button.

You now get two options. The first option provides an automatic search for the required driver. The second option allows you to specify the location of the driver. If you don't know the location of the driver choose the automatic search which would find the required driver from the manufacturer supplied CD or Floppy disk. Windows would install the required driver and may ask you to restart the system for the changes to take affect. Use this procedure to install drivers for all the devices that contain an exclamation mark. Windows is completely setup when there are no more exclamation marks in the device manager.

1.4 Latest Expansion Slots


BLADECENTER HS20 FC EXPANSION CARD
Manufacturer: IBM
Part Number: 48P7061

Specifications: Data transfer rate: 2.12 Gbps ; Connectivity technology: Wired See full specs


1.1 Latest processor for Desktop Computers


Extreme Gaming with the Intel® Core™ i7 Processor Extreme Edition
For Desktops

The ultimate immersive gaming experience Conquer the world of extreme gaming with the highest performing desktop processor on the planet: the Intel® Core™ i7 processor Extreme Edition.‡1 With intelligent multi-core technology that kicks into overdrive as your activity becomes more intense, it delivers breakthrough performance in gaming. Plus, multitask demanding applications up to 25% faster‡2 and unleash amazing power for digital media crea.

1.2 Latest processor for Server


This industry's first quad-core processor for mainstream servers provides breakthrough performance and capabilities for the ultimate in powerful, dense and energy efficient servers. With the Quad-Core Intel Xeon processor you get breakthrough performance - up to 50% greater than the industry-leading Dual-Core Intel Xeon processor in the same power envelope.